DAY 3: EARS
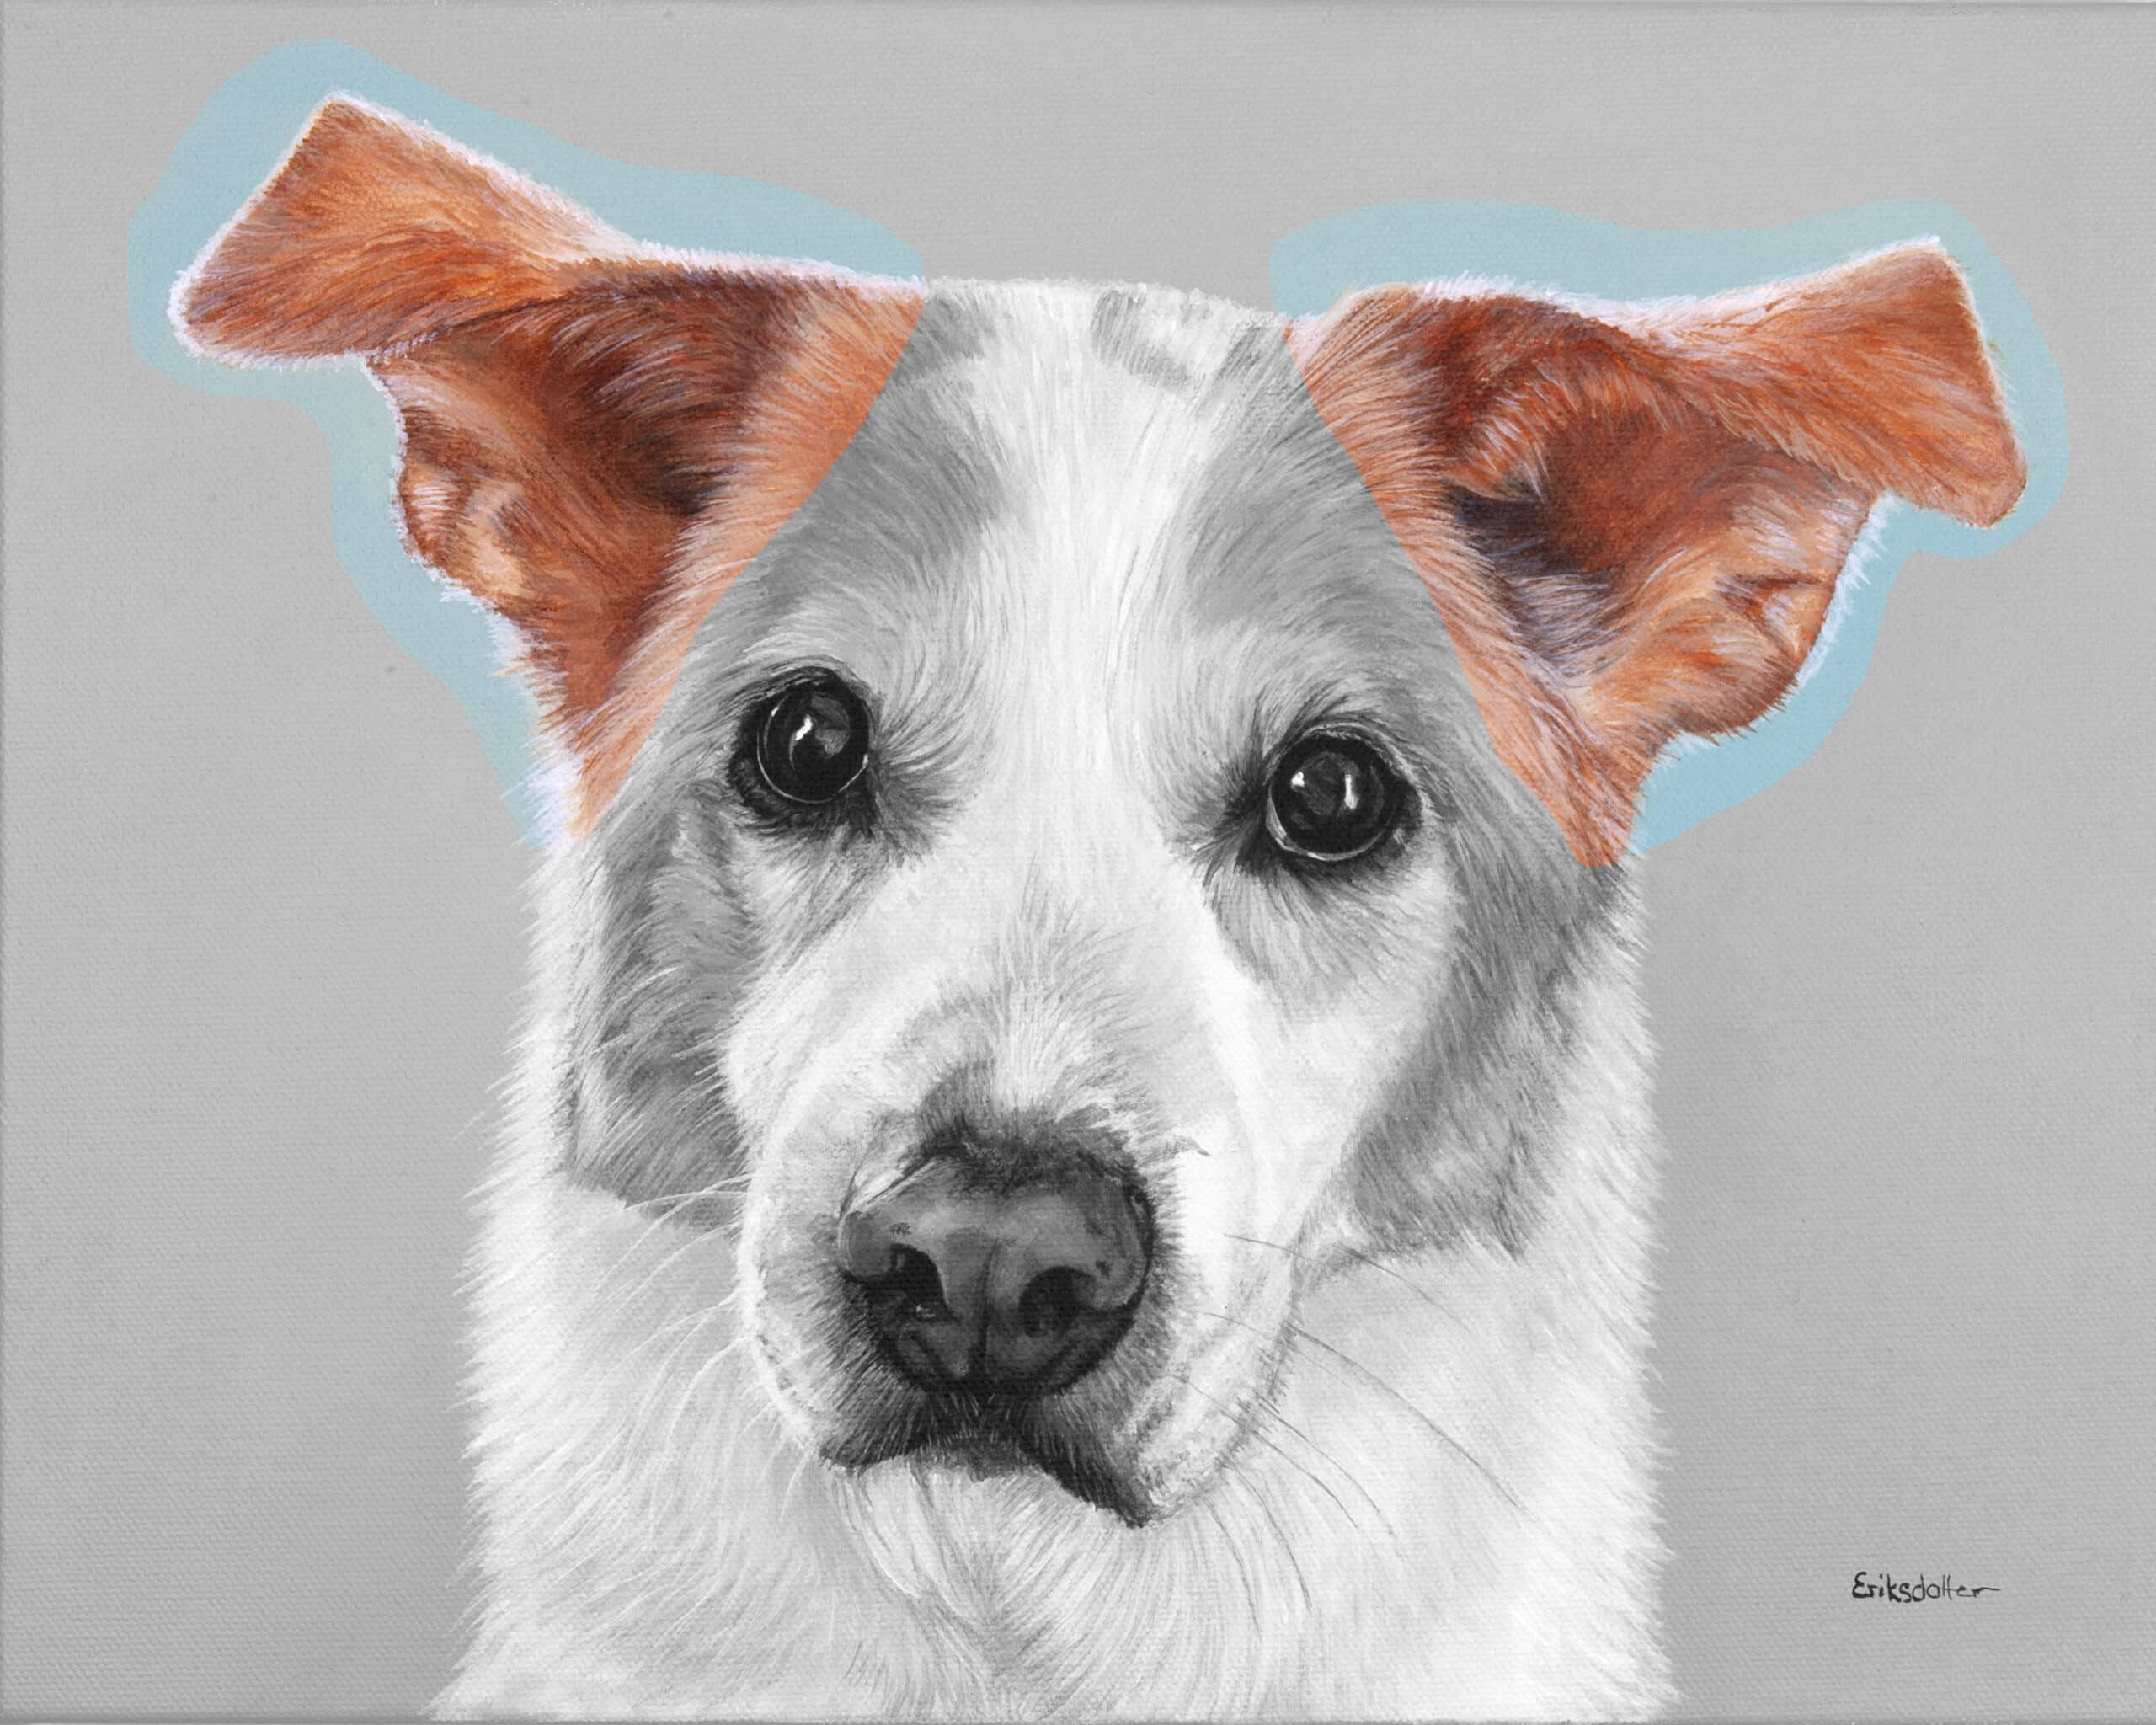
I’ve highlighted the area in the above photo we’re focusing on, the ears. If it’s easier for you to use your downloadable reference photos, please do so! Now let’s move on to some guiding steps (remember, progress over perfection!).
No matter if the ears are standing straight up, hanging down, covered in hair or barely visible, you want to simply pick a point where you want to begin.
To make it even easier, break up the ear into sections so you paint the inside of the ear first, then focus on the outside (top). You’ll blend the sections together eventually. Study what you see and paint a layer first.
INSTRUCTIONS:

Read all the steps first, then come back to step 1.
To keep it simply, use the following colors: Mars Black, Raw Umber, Raw Sienna, and Unbleached Titanium.
1. Start at the ear canal and the darkest area of the inside ear. Mix a dab of black with some Raw Umber for the innermost area, then add some Raw Sienna as you gradually paint the darker area. Even though there is now fur hanging over the darker area, see if you can study what you see and paint the foundational layer first – the layer that came before the fur that was painted on top of it.
2. Now, continue painting the rest of the inner ear (the inside of the flap) with various months of Unbleached Titanium and Raw Sienna to match the colors I used. Use brushstrokes that mimic strands of hair. The chisel blender brushes are great for this.
3. See the lighter areas? That’s just Unbleached Titanium.
4. Before we’re done with the inside of the ear, add those strands of fur that is hanging over the opening to the inner ear, and finish off the inside of the ear.
5. Now move on to the top of the ear. Use the same lighter blends of Raw Sienna and Unbleached Titanium and notice the direction the strands of hair grow.
6. The sunlight came from behind Charlie and that’s why the top of his ear has lots of brilliant highlights painted in Titanium White. This is optional, but it gives him a lovely etheric glow.
The left ear now has a completed layer of paint. If you’re happy with it, move on to the right ear and follow the same steps. Or add another layer, make some tweaks here and there, but step away if you feel like you’re overdoing it.
REVIEW:
Take stock of where you are. Step back and admire your pet portrait so far. Maybe compare it with the reference photo and see how the main features and the ears compare.
I’m so proud of you. You’re doing it. You’re following through with your free 5-Day Pet Portrait Painting Challenge. All is well and you’re on time.
Look out for tomorrow’s email for your next section when we’re going to merge all these ‘floating’ sections together.
xo,
Erica