DAY 5: BODY
Yay! Congratulations friend, you’re on the last day of the 5 Day Pet Portrait Painting Challenge and today you’re finishing your pet portrait!
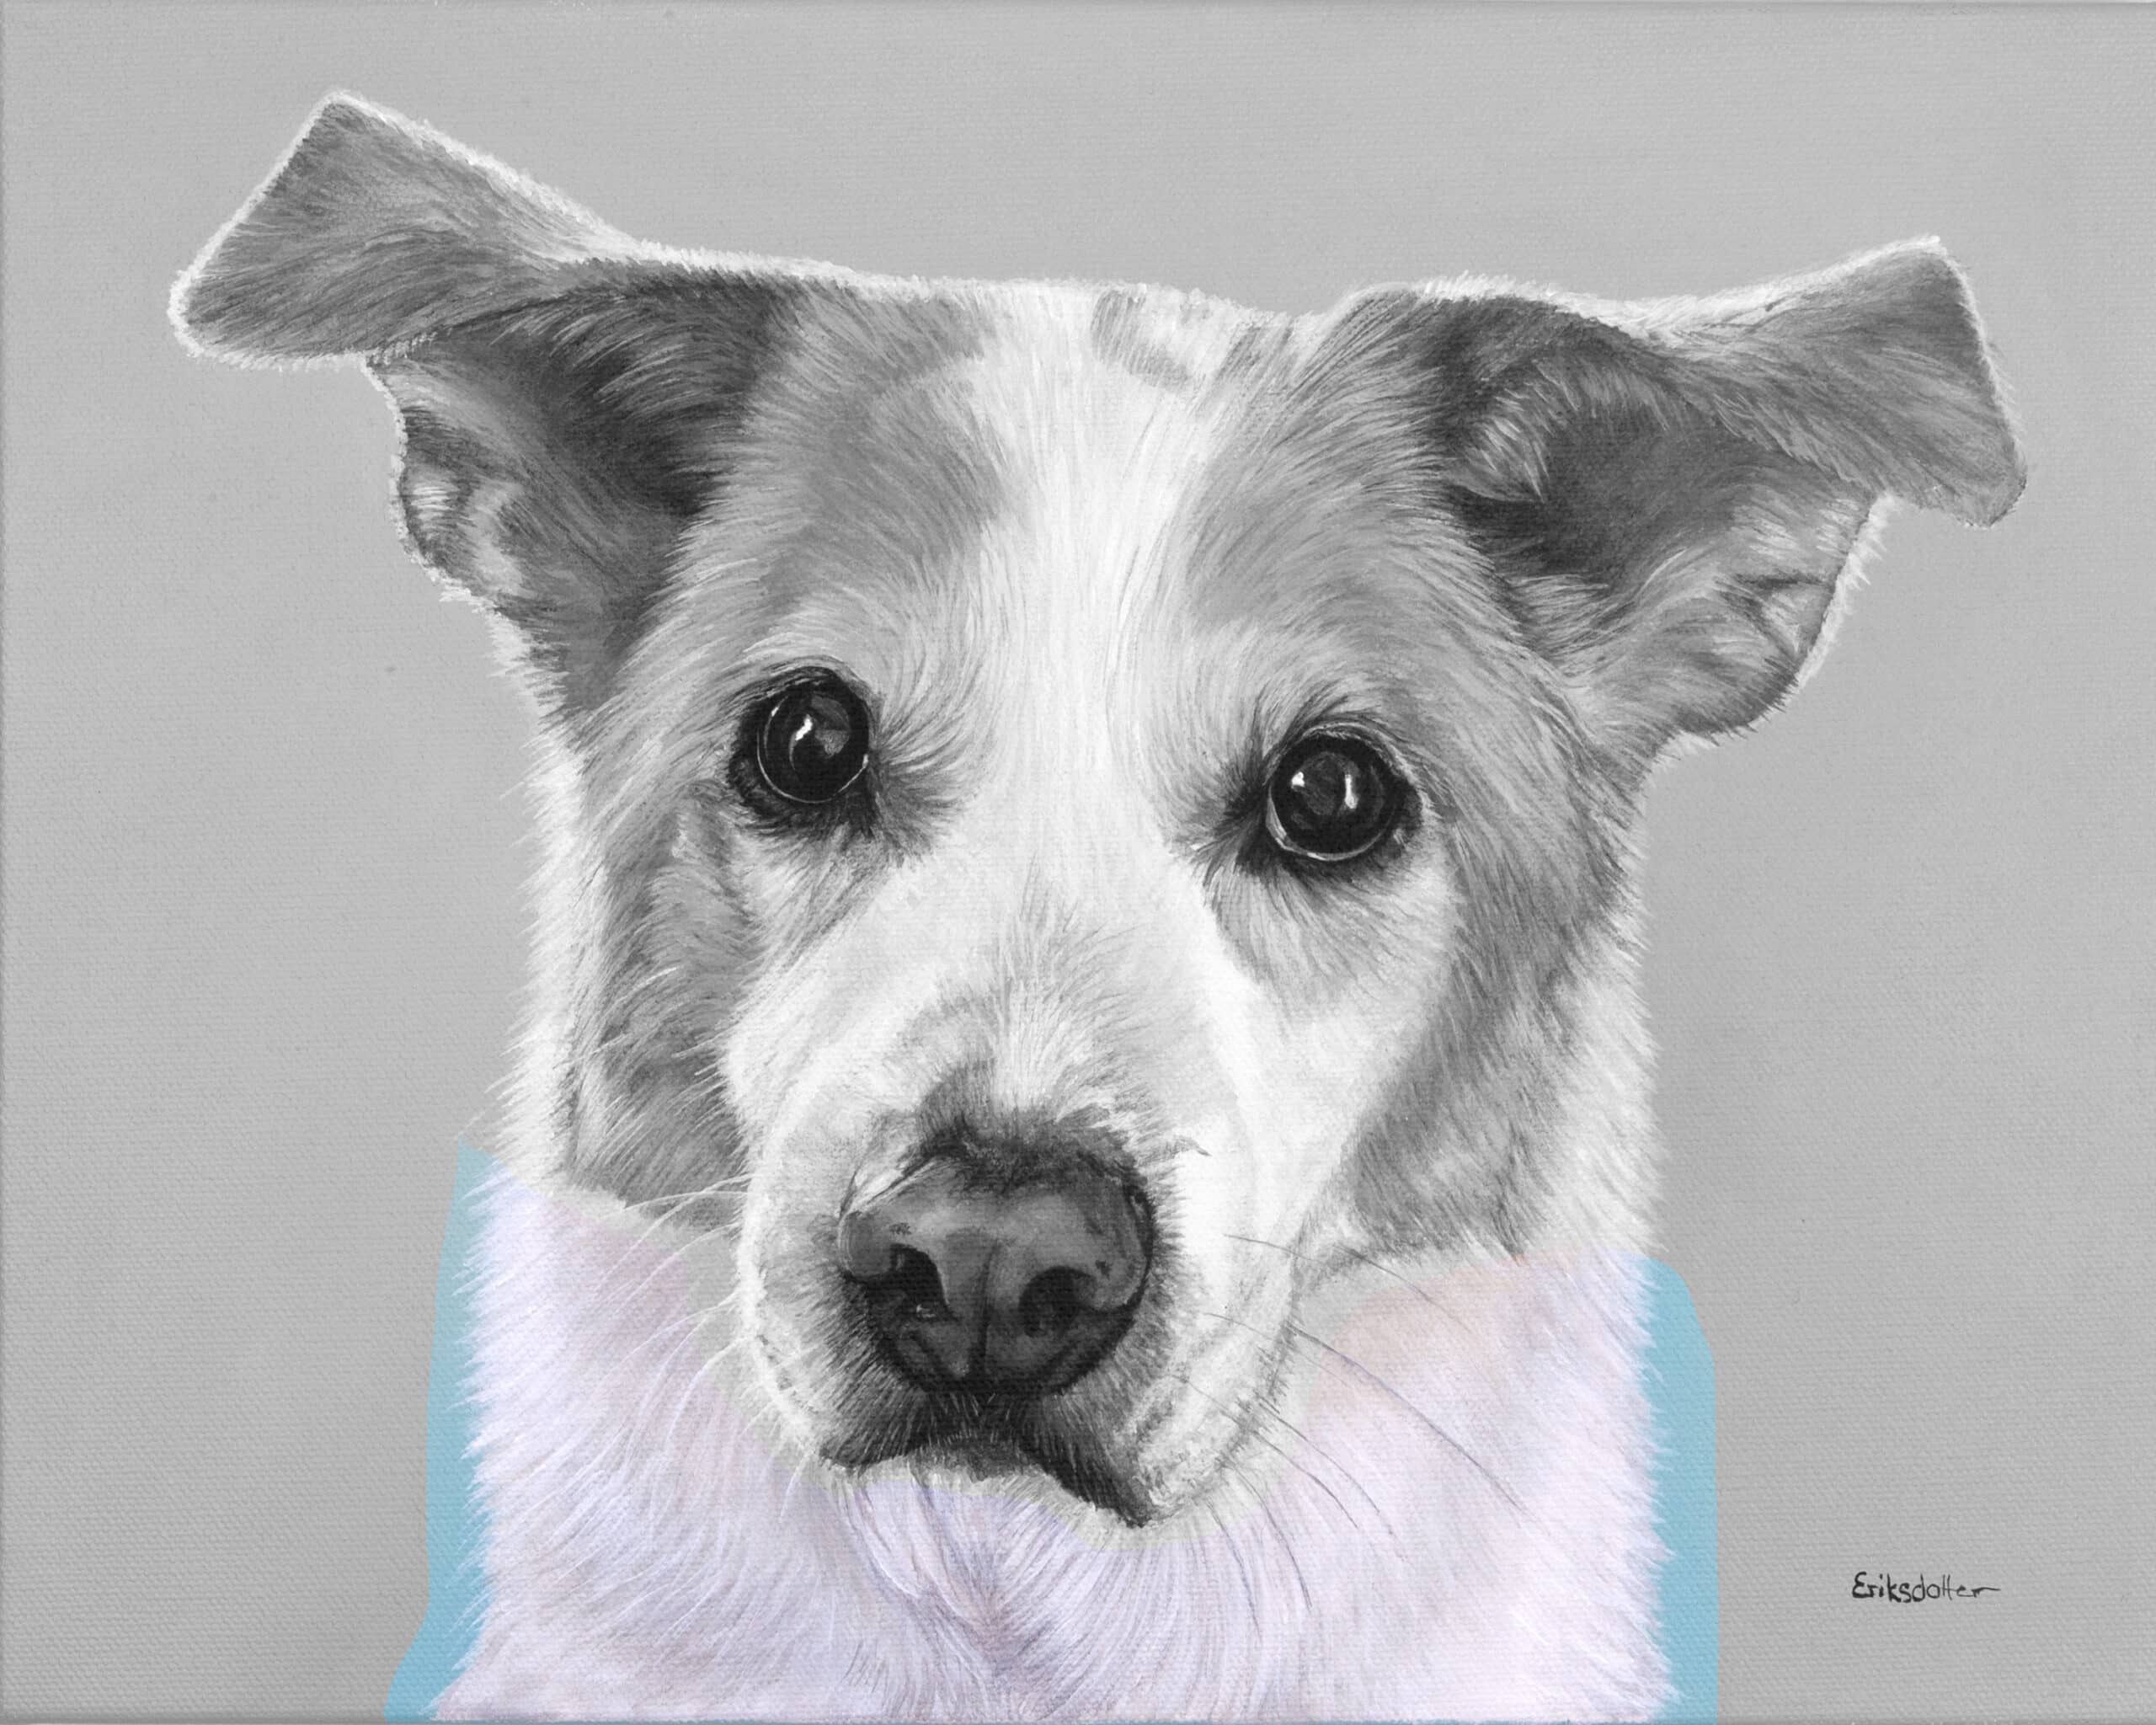
I’ve highlighted the area in the above photo we’re focusing on – the BODY! Remember you have access to the full reference photo of the painting (under Preparing for Success) if you prefer to use it. Now let’s move on to some guiding steps (remember, progress over perfection!).
INSTRUCTIONS:

Read all the steps first, then come back to step 1.
To keep it simple, use the following colors: Titanium White and Neutral Gray No. 5
Tip! The key with painting the body is to paint in the direction of how the fur is growing. The fur on Charlie’s neck and body is a little bit longer so you’ll do longer brushstrokes.
Charlie’s body wasn’t gray. It was white. The tricky part with white fur is to make it stand out. The gray paint is used to provide shading and to define his body shape under the fur. We wouldn’t see the white fur if we didn’t add shading.
White fur can be painted in many different color hues that all make up white, but we’ll keep it simple here and just use Titanium White.
Let’s talk about blending. When I blend paint, I blend it on the palette for the right hue and consistency. I also blend it into the paint that’s already on the canvas as my paint is often still wet on canvas (some people call this wet-on-wet), and I’ll show you this in video lessons inside How to Paint a Dog Portrait). In this free challenge, however, we’ll continue to keep it simple that’s easy to finish in 20 minutes.
1. Let’s get into the painting right away by covering his body with a smooth layer of white paint.
2. Now let’s add shading. See the chin hair under his mouth? With a blend of gray and white, add gray brushstrokes where I’ve added gray brushstrokes. Some are coming out from the bottom lip area and others are at the end of the white “beard”. Paint some lines in the middle too to add definition to the white fur.
3. Continue using the gray and white paint blend and add some shading along his mouth and the parts closest to his face. Paint the strands of hair in the direction of the fur and stop where it meets white fur.
4. See where the white fur stands out on both sides of his body? It’s like a bow shaped wave of white fur on both sides in the middle of his chest. It’s part of his body shape. You’re going to leave most of this white, but add a few strokes of gray for definition here, working towards the middle of the chest where the gray-most part is of Charlie’s body. Do this on both sides.
5. Add some gray brushstrokes in the sections you have left and you see that I’ve added gray brushstrokes.
That’s the white first layer and the shading taken care of. If you didn’t use varying degrees of grays when you added the shading, add some brushstrokes everywhere on Charlies’ body with a lighter gray color. This adds a bit more depth and dimension.
6. Now we want to add some more Titanium White and focus on where the white fur stands out. You can add it in all areas if you want too and paint over some of the gray strands of hair.
BONUS 1: Whiskers
Now that you’ve painted Charlie’s face and body, you can add the whiskers. See how Charlie’s whiskers are white on one side and gray on the other side? It’s because of where the light is kissing his face. His whiskers were the same colors and you’re welcome to paint them in the same color.
Some pets have more defined whiskers than others. Adding them or making them bolder than what they are supposed to be can significantly alter the appearance of your pet. Paint them thinner in the beginning and don’t forget that even whiskers are done in layers with different tones for shading and light reflection to each whisker. Then take a step back and add more if you need it or after you’ve talked with your client.
Tip! If you’re scared of adding whiskers, that’s a normal feeling. Wait for the paint to dry and then draw the whiskers with a thin pencil. Then paint following the pencil lines.
BONUS 2: Background
I add the background color somewhere in the middle of my painting process, and in this challenge we’re adding it as a bonus step.
You have free choice in what color you’d want to add as a background. My backgrounds are blends of many colors, if you want to keep it simply just pick a lovely shade and have fun. Add 2-3 layers to the paint for a richer hue.
Once you’ve painted the background color, go back over your portrait of Charlie and add strands of fur all along the edges. See where I’ve painted fur on top of the background along the outline of Charlie’s body? That’s what you’ll do in this extra step.
REVIEW:
Wow! You did it! Take a deep breath and admire your pet portrait.
You followed through. You chose to be brave, grabbed some supplies and went for it. You followed the written instructions (which for many is harder than following what I do in the video lessons inside How to Paint a Dog Portrait and How to Paint Soulful Eyes) and you now have a finished portrait of Charlie.
You’re amazing, and I’m so proud of you!
I’d love to see your finished painting. Snap a photo and email it to me at support@studioeriksdotter.com.
That wraps up the 5 Day Pet Portrait Painting Challenge, but I’ve got something even bigger coming next week! Stay tuned.
Lots of love and proud feelings,
xo,
Erica